Sonicwall ssl vpn licenses
Author: m | 2025-04-25
SonicWall Firewall SSL VPN 5 User License [01-SSC-8630] 155.00; SonicWall Firewall SSL VPN 10 User License [01-SSC-8631] 248.00; SonicWall Firewall SSL VPN 15 User License [01-SSC-6111] 269.00; SonicWall Firewall SSL VPN 25 User License [01-SSC-8632] 323.00; SonicWall Firewall SSL VPN 50 User License [01-SSC-8633] 427.00 SonicWall SOHO 250 – supports 5 Global VPN Clients 25 SSL VPN licenses; SonicWall TZ 300 – supports 10 Global VPN Clients 50 SSL VPN licenses; SonicWall TZ 350 – supports 10 Global VPN Clients 75 SSL VPN licenses; SonicWall TZ 400 – supports 25 Global VPN Clients 100 SSL VPN licenses;

SSL VPN license - SonicWall Community
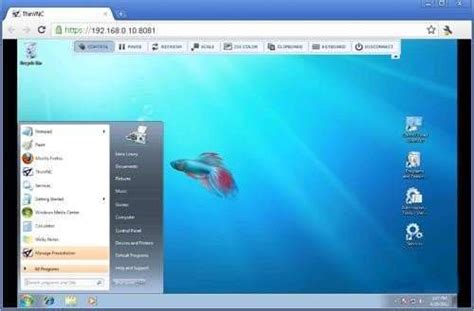
DescriptionUsing SonicWall Mobile Connect For iPhone and iPadSonicWall Mobile Connect is an app for iPhone and iPad that enables secure, mobile connections to private networks protected by SonicWall security appliances.To get started with SonicWall Mobile Connect: Install SonicWall Mobile Connect from the App Store. Enter connection information (server name, username, password, etc.). Initiate a connection to the network. SonicWall Mobile Connect establishes a SSL VPN tunnel to the SonicWall security appliance. You can now access resources on the private network. All traffic to and from the private network is securely transmitted over the SSL VPN tunnel. Apple Product Support iPhone 5 and newer – running Apple iOS 5 or higher. iPhone 4S – running Apple iOS 5 or higher. iPhone 4 – running Apple iOS 4.2 or higher. iPhone 3GS – running Apple iOS 4.2 or higher. iPhone 3G – running Apple iOS 4.2 or higher. iPad 2 – running Apple iOS 4.2 or higher. iPad – running Apple iOS 4.2 or higher. iPod Touch (2nd Generation or later) – running Apple iOS 4.2 or higher. SonicWall Appliance SupportSonicWall Mobile Connect is a free app, but requires a concurrent user license on one of the following SonicWall solutions in order to function properly. SonicWall Aventail E-Class Secure Remote Access (SRA) appliances running 10.5.4 or higher. SonicWall SRA appliances running 5.5 or higher. SonicWall Next-Generation Firewall appliances including the TZ, NSA, E-Class NSA running SonicOS 5.8.1.0 or higher. Required Network InformationIn order to use SonicWall Mobile Connect, you will need the following information from your network administrator or IT support. Server name or address – This is either the IP address or URL of the SSL VPN server that you will connect to. Username and password – Typically, you will be required to enter your username and password, although some connections SonicWall Firewall SSL VPN 5 User License [01-SSC-8630] 155.00; SonicWall Firewall SSL VPN 10 User License [01-SSC-8631] 248.00; SonicWall Firewall SSL VPN 15 User License [01-SSC-6111] 269.00; SonicWall Firewall SSL VPN 25 User License [01-SSC-8632] 323.00; SonicWall Firewall SSL VPN 50 User License [01-SSC-8633] 427.00 SonicWall SOHO 250 – supports 5 Global VPN Clients 25 SSL VPN licenses; SonicWall TZ 300 – supports 10 Global VPN Clients 50 SSL VPN licenses; SonicWall TZ 350 – supports 10 Global VPN Clients 75 SSL VPN licenses; SonicWall TZ 400 – supports 25 Global VPN Clients 100 SSL VPN licenses; DescriptionWhen client connects to SonicWall SSL-VPN using Netextender from his computer he will get the error "Connection failure: no routes found!" as below.CauseThe reason for this error is, that no Address Objects were selected in the Client Routes of the SSL VPN settings as below.On Gen7 devices (Firmware on 7.x):On Gen6 (Firmware 6.x) and Gen5 (Firmware 5.x) devices: Resolution for SonicOS 7.XThis release includes significant user interface changes and many new features that are different from the SonicOS 6.5 and earlier firmware. The below resolution is for customers using SonicOS 7.X firmware.Login to your SonicWall Management page.Navigate to Network > SSL VPN > Client Settings, Click on configure Default Device Profile used by SSL VPN.Go to the Client Routes tab, add required Address Objects from Networks to Client Routes.Click OK at the bottom of the page to accept the changes.Resolution for SonicOS 6.5This release includes significant user interface changes and many new features that are different from the SonicOS 6.2 and earlier firmware. The below resolution is for customers using SonicOS 6.5 firmware.The resolution for this issue is to add the required Address Object in the Client Routes section as below and accept the changes.Login to your SonicWall Management page.Navigate to Manage > SSL VPN > Client Settings, Click on Configure, under Client Routeson the right side select required Address Object in Add Client Routes.Click Accept at the bottom of the page to accept the changes. Resolution for SonicOS 6.2 and BelowThe below resolution is for customers using SonicOS 6.2 and earlier firmware. For firewalls that are generation 6 and newer we suggest to upgrade to the latest general release of SonicOS 6.5 firmware.The resolution for this issue is to add the required Address Object in the Client Routes section as below and accept the changes.In Gen 5 - SonicOS (5.8 & below) and Gen 6 - SonicOS (6.1 & above)Login to your SonicWall Management page.Navigate to SSL VPN > Client Routes, on the right side select required Address Object in Add Client Routes.Click Accept at the top of the page to accept the changes. It will be update at the bottom of that section as shown in the below picture.In Gen 5 -SonicOS (5.9 & above)Login to your SonicWall management page.Navigate to SSL VPN > Client Settings, on the right side configure Default Device Profile used by SSL VPN.Go to the Client Routes tab, add required Address Objects fromComments
DescriptionUsing SonicWall Mobile Connect For iPhone and iPadSonicWall Mobile Connect is an app for iPhone and iPad that enables secure, mobile connections to private networks protected by SonicWall security appliances.To get started with SonicWall Mobile Connect: Install SonicWall Mobile Connect from the App Store. Enter connection information (server name, username, password, etc.). Initiate a connection to the network. SonicWall Mobile Connect establishes a SSL VPN tunnel to the SonicWall security appliance. You can now access resources on the private network. All traffic to and from the private network is securely transmitted over the SSL VPN tunnel. Apple Product Support iPhone 5 and newer – running Apple iOS 5 or higher. iPhone 4S – running Apple iOS 5 or higher. iPhone 4 – running Apple iOS 4.2 or higher. iPhone 3GS – running Apple iOS 4.2 or higher. iPhone 3G – running Apple iOS 4.2 or higher. iPad 2 – running Apple iOS 4.2 or higher. iPad – running Apple iOS 4.2 or higher. iPod Touch (2nd Generation or later) – running Apple iOS 4.2 or higher. SonicWall Appliance SupportSonicWall Mobile Connect is a free app, but requires a concurrent user license on one of the following SonicWall solutions in order to function properly. SonicWall Aventail E-Class Secure Remote Access (SRA) appliances running 10.5.4 or higher. SonicWall SRA appliances running 5.5 or higher. SonicWall Next-Generation Firewall appliances including the TZ, NSA, E-Class NSA running SonicOS 5.8.1.0 or higher. Required Network InformationIn order to use SonicWall Mobile Connect, you will need the following information from your network administrator or IT support. Server name or address – This is either the IP address or URL of the SSL VPN server that you will connect to. Username and password – Typically, you will be required to enter your username and password, although some connections
2025-04-02DescriptionWhen client connects to SonicWall SSL-VPN using Netextender from his computer he will get the error "Connection failure: no routes found!" as below.CauseThe reason for this error is, that no Address Objects were selected in the Client Routes of the SSL VPN settings as below.On Gen7 devices (Firmware on 7.x):On Gen6 (Firmware 6.x) and Gen5 (Firmware 5.x) devices: Resolution for SonicOS 7.XThis release includes significant user interface changes and many new features that are different from the SonicOS 6.5 and earlier firmware. The below resolution is for customers using SonicOS 7.X firmware.Login to your SonicWall Management page.Navigate to Network > SSL VPN > Client Settings, Click on configure Default Device Profile used by SSL VPN.Go to the Client Routes tab, add required Address Objects from Networks to Client Routes.Click OK at the bottom of the page to accept the changes.Resolution for SonicOS 6.5This release includes significant user interface changes and many new features that are different from the SonicOS 6.2 and earlier firmware. The below resolution is for customers using SonicOS 6.5 firmware.The resolution for this issue is to add the required Address Object in the Client Routes section as below and accept the changes.Login to your SonicWall Management page.Navigate to Manage > SSL VPN > Client Settings, Click on Configure, under Client Routeson the right side select required Address Object in Add Client Routes.Click Accept at the bottom of the page to accept the changes. Resolution for SonicOS 6.2 and BelowThe below resolution is for customers using SonicOS 6.2 and earlier firmware. For firewalls that are generation 6 and newer we suggest to upgrade to the latest general release of SonicOS 6.5 firmware.The resolution for this issue is to add the required Address Object in the Client Routes section as below and accept the changes.In Gen 5 - SonicOS (5.8 & below) and Gen 6 - SonicOS (6.1 & above)Login to your SonicWall Management page.Navigate to SSL VPN > Client Routes, on the right side select required Address Object in Add Client Routes.Click Accept at the top of the page to accept the changes. It will be update at the bottom of that section as shown in the below picture.In Gen 5 -SonicOS (5.9 & above)Login to your SonicWall management page.Navigate to SSL VPN > Client Settings, on the right side configure Default Device Profile used by SSL VPN.Go to the Client Routes tab, add required Address Objects from
2025-04-22(not recommended)- Select to display the SonicWALL appliance’s management link on the SSL VPN portal. This option is not selected by default. It is recommended not to select this option. This option only applies to the Internet Explorer browser on PCs running Windows when Use Selfsigned Certificate is selected from the Certificate Selection drop-down menu on the SSL VPN > Server Settings page. Portal Logo Settings This section describes the settings for configuring the logo displayed at the top of the Virtual Office portal. Default Portal Logo – Displays the default portal logo which is the SonicWall logo. Use Default SonicWall Logo – Select this checkbox to use the SonicWall logo supplied with the appliance. This option is not selected by default. Customized Logo (Input URL of the Logo) — Enter the URL for the logo you want to display. The logo must be in GIF format of size 155 x 36; a transparent or light background is recommended.
2025-04-21May not require this. Domain name – The domain name of the SSL VPN server. SonicWall Mobile Connect may be able to automatically determine this when it first contacts the server, or there may be multiple domains that can be selected. Installing SonicWall Mobile ConnectSonicWall Mobile Connect is installed through the Apple App Store. On your iPhone or iPad, tap on the App Store icon. Go to the Search tab, enter SonicWall Mobile Connect, and tap Search. In the search results, select SonicWall Mobile Connect. Tap Free and then Install. The app will install on your device. When installation is complete, the SonicWall Mobile Connect icon will appear on your device. ResolutionCreating a ConnectionThe process of creating a Mobile Connect connection is slightly different depending on which type of SonicWall appliance you are connecting to. The following sections describe how to create a connection:Creating a Connection to SonicWall Firewall and SRA Appliances The first time you launch SonicWall Mobile Connect, you will be prompted to enable VPN functionality. Click Enable. You will then be presented with the screen to begin your first connection. Click Add connection. Name: Enter a descriptive name for the connection. Server: Enter the URL or IP address of the server. Tap Next. SonicWall Mobile Connect will then attempt to contact the SonicWall appliance. If the attempt fails, a warning message will display, asking if you want to save the connection. Before tapping Save, verify that the server address or URL is spelled correctly. If SonicWall Mobile Connect successfully contacts the server, you will be prompted to enter your Username and Password (unless the server does not require this information). The Domain field is auto-populated with the default domain from the server. To select a different domain, tap on Domain to display a dropdown menu of the
2025-04-24