Autocad command line at cursor
Author: i | 2025-04-25
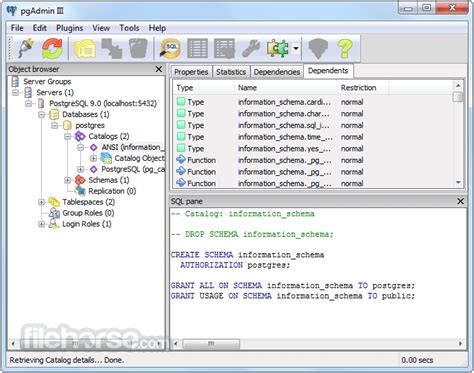
AutoCAD Command Prompt Window / Command Line - Missing / Disappeared / Not Working / At Cursor
AutoCAD 2-Selecting a tool, command line, cursor - YouTube
For experienced AutoCAD users, the command-line interface is a shortcut for creating objects and specifying properties. AutoCAD Map 3D toolset provides a command interface near the cursor. This interface is called dynamic input. The older command line window is hidden by default, but you can display it at any time. With dynamic input, you canLaunch commands by typing them directly into the drawing area. Respond to command prompts in a tooltip or tooltip menu near the cursor, instead of on the command line.View the location of the crosshairs as coordinate values in a tooltip.Enter coordinate values in the tooltip when a command prompts for a point, instead of on the command line.View distance and angle values when a command prompts for a second point. An example of dynamic inputNote:With the command line hidden, detailed information for some commands is not visible. To see this information, display the command line by pressing CTRL+9 on the keyboard.Keep in mind the following rules :Some commands require that you specify vectors with your cursor. When you finish, press Esc.Some commands require that you select an object. Click the object and press Enter.Some commands have multiple input fields. Press the Tab key to move from one to another.When the down arrow icon appears in a prompt, press the down arrow on your keyboard to see a list of options for that command. Press the down arrow again to move between options, and then press Enter to select the highlighted one.To use dynamic inputPosition your cursor over an empty space in the map. Enter circle and press Enter.Respond to the prompts to draw a circle.For the center point of the circle, click somewhere in the map.For the radius of the circle, enter 500 and press Enter.To turn dynamic input on or off On the status bar, click , or press F12. To turn off dynamic input temporarilyHold down the F12 key while you work. To control dynamic input settingsRight-click and click Settings. Note:By default, dynamic input is set to relative (not absolute) coordinates. For example, entering 10,10 and then 20,20 draws a line from 10,10 to 30,30. If you frequently enter absolute coordinates, you can change this setting.To hide or show the command line windowPress CTRL+9 on the keyboardTo display the AutoCAD text window with all your past command-line input history, press F2. To hide this information, press F2 again.To continue this tour of AutoCAD Map. AutoCAD Command Prompt Window / Command Line - Missing / Disappeared / Not Working / At Cursor AutoCAD Forum Re: Command Line Next to Cursor; AutoCAD. Community Forums; AutoCAD Forum cancel. Turn on suggestions. Auto-suggest helps you quickly narrow down your search results by suggesting possible matches as you type. Command Line Next to Cursor When in a command, the options don't actually show next to the cursor. All I get are AutoCAD Command Not Showing on Screen Shorts. AutoCAD command not showing on cursor. AutoCAD cursor not showing commands AutoCAD not showing commandAutoCAD Autocad mechanical 2025 tutorials for beginners AutoCAD Tutorial: 2D Fundamentals Drawing lines with the LINE command 1. Move the graphics cursor to the first icon in the Draw panel. This icon is the Line icon. Note that a brief description of the Line command appears next to the cursor. 2. Select the icon by clicking To get the command line next to the cursor in AutoCAD, you can use the dynamic input feature. Go to the status bar and click on the Dynamic Input button to enable it. This will show the command line next to the cursor. 6. How to access block library in AutoCAD? Why is there a red dot beside my cursor in AutoCAD? A red dot by your cursor indicates you are recording. How do I turn on floating command line in AutoCAD? 2 the floating Command Line is switched on by default. If yours is not simply head over to the Settings dialog: Settings Program options Command line Command line use new floating Line Command and the AutoCAD Coordinate Unit 1 The Line Command _____ Introduction The Line Command. A line is a geometric entity that has length and direction, but has no thickness. But in AutoCAD, lines are drawn by specifying the starting and ending points through the cursor. Line creates straight line segments with Close and Undo features. To resize the command bar or command line in AutoCAD, you can perform the following steps: Position your cursor at the top edge of the command line until it turns into a double-headed arrow. Click and drag the cursor upwards or downwards to Guys today we are learning about How to change background color in AutoCAD and How do I change the background color in AutoCAD and how to change the canvas background color in AutoCAD.Do you know How to change the background color in AutoCAD?Follow these steps to change the background color in AutoCAD. (Common Method)By default, the background color of AutoCAD is black. You can change that. But when you print AutoCAD drawing in pdf, the pdf background will be white only.1. Click on the ‘Application menu’ located in the upper left corner of AutoCAD.2. Then select ‘options’ located on the bottom right side. One dialogue box will be open.3. Or type ‘OP’ in the command bar and press Enter key. One dialogue box will be open.4. Or you can right-click on the workspace area and some options will be open. Select “Options” from here. The same dialogue box will open.5. By default, it will open by selecting the ‘Drafting’ option. If not selected, then select the ‘Drafting’ tab.6. By clicking on ‘colors’, one dialogue box will be open.7. Select ‘uniform background’ from the interface element. And change the color which you want.8. If you want to change the background color from black to white, then select the white color from here.After selection click on ‘Apply and close. AutoCAD workspace background color will be changed as per selection.How to change the background color in AutoCADHow to change the canvas background color in AutoCAD?To change the canvas background color in AutoCAD for Windows follow these simple steps.1. First of all on the command line in AutoCAD you have to type “Options“2. Then in the Options tap on the Display tab & then click on the “Colors button”.3. After that Choose 2D model space and uniform background which is selected by default.4. Then Click the “Color” drop-down menu & select your desired color what you want.5. And last Click “Apply” & Close & then click “OK“To change the canvas background color in CAD for MAC follow these simple steps.1. First of all on the command line in AutoCAD just type “Options”2. In Application Preferences you have to click on the Look and Feel tab.3. Then click the Modelspace menu & select your desired color.4. Click OK.How to change cursor color in CAD?If you want to know How to change the cursor color in AutoCAD then follow the steps below.1. First of all, Click on the “Application menu” (Logo of AutoCAD) located in the upper left corner of AutoCAD.2. Click on the ‘Option’. One dialogue box will open.3. Go to the “Drafting” tab. And then click on “Colors…”.4. Now click on the “Crosshair” option in the ‘Interface Elements’ panel.5. Change the color as per your requirement and click on “Apply & Close”.6. At last, click on ‘OK’, and the cursor color is changed now.Thank you for reading… Also, read our other articles related to AutoCAD queries.People also askWhat is the default background color for AutoCAD?Ans: The AutoCAD default color is Black, in drawings. AboutComments
For experienced AutoCAD users, the command-line interface is a shortcut for creating objects and specifying properties. AutoCAD Map 3D toolset provides a command interface near the cursor. This interface is called dynamic input. The older command line window is hidden by default, but you can display it at any time. With dynamic input, you canLaunch commands by typing them directly into the drawing area. Respond to command prompts in a tooltip or tooltip menu near the cursor, instead of on the command line.View the location of the crosshairs as coordinate values in a tooltip.Enter coordinate values in the tooltip when a command prompts for a point, instead of on the command line.View distance and angle values when a command prompts for a second point. An example of dynamic inputNote:With the command line hidden, detailed information for some commands is not visible. To see this information, display the command line by pressing CTRL+9 on the keyboard.Keep in mind the following rules :Some commands require that you specify vectors with your cursor. When you finish, press Esc.Some commands require that you select an object. Click the object and press Enter.Some commands have multiple input fields. Press the Tab key to move from one to another.When the down arrow icon appears in a prompt, press the down arrow on your keyboard to see a list of options for that command. Press the down arrow again to move between options, and then press Enter to select the highlighted one.To use dynamic inputPosition your cursor over an empty space in the map. Enter circle and press Enter.Respond to the prompts to draw a circle.For the center point of the circle, click somewhere in the map.For the radius of the circle, enter 500 and press Enter.To turn dynamic input on or off On the status bar, click , or press F12. To turn off dynamic input temporarilyHold down the F12 key while you work. To control dynamic input settingsRight-click and click Settings. Note:By default, dynamic input is set to relative (not absolute) coordinates. For example, entering 10,10 and then 20,20 draws a line from 10,10 to 30,30. If you frequently enter absolute coordinates, you can change this setting.To hide or show the command line windowPress CTRL+9 on the keyboardTo display the AutoCAD text window with all your past command-line input history, press F2. To hide this information, press F2 again.To continue this tour of AutoCAD Map
2025-04-24Guys today we are learning about How to change background color in AutoCAD and How do I change the background color in AutoCAD and how to change the canvas background color in AutoCAD.Do you know How to change the background color in AutoCAD?Follow these steps to change the background color in AutoCAD. (Common Method)By default, the background color of AutoCAD is black. You can change that. But when you print AutoCAD drawing in pdf, the pdf background will be white only.1. Click on the ‘Application menu’ located in the upper left corner of AutoCAD.2. Then select ‘options’ located on the bottom right side. One dialogue box will be open.3. Or type ‘OP’ in the command bar and press Enter key. One dialogue box will be open.4. Or you can right-click on the workspace area and some options will be open. Select “Options” from here. The same dialogue box will open.5. By default, it will open by selecting the ‘Drafting’ option. If not selected, then select the ‘Drafting’ tab.6. By clicking on ‘colors’, one dialogue box will be open.7. Select ‘uniform background’ from the interface element. And change the color which you want.8. If you want to change the background color from black to white, then select the white color from here.After selection click on ‘Apply and close. AutoCAD workspace background color will be changed as per selection.How to change the background color in AutoCADHow to change the canvas background color in AutoCAD?To change the canvas background color in AutoCAD for Windows follow these simple steps.1. First of all on the command line in AutoCAD you have to type “Options“2. Then in the Options tap on the Display tab & then click on the “Colors button”.3. After that Choose 2D model space and uniform background which is selected by default.4. Then Click the “Color” drop-down menu & select your desired color what you want.5. And last Click “Apply” & Close & then click “OK“To change the canvas background color in CAD for MAC follow these simple steps.1. First of all on the command line in AutoCAD just type “Options”2. In Application Preferences you have to click on the Look and Feel tab.3. Then click the Modelspace menu & select your desired color.4. Click OK.How to change cursor color in CAD?If you want to know How to change the cursor color in AutoCAD then follow the steps below.1. First of all, Click on the “Application menu” (Logo of AutoCAD) located in the upper left corner of AutoCAD.2. Click on the ‘Option’. One dialogue box will open.3. Go to the “Drafting” tab. And then click on “Colors…”.4. Now click on the “Crosshair” option in the ‘Interface Elements’ panel.5. Change the color as per your requirement and click on “Apply & Close”.6. At last, click on ‘OK’, and the cursor color is changed now.Thank you for reading… Also, read our other articles related to AutoCAD queries.People also askWhat is the default background color for AutoCAD?Ans: The AutoCAD default color is Black, in drawings. About
2025-04-15How to make cursor straight in autocad?How to make cursor straight in autocad? – The answer is in this article! Finding the right AutoCAD tutorials and even more, for free, is not easy on the internet, that’s why our CAD-Elearning.com site was created to offer you the best answers to your questions about AutoCAD software.Millions of engineers and designers in tens of thousands of companies use AutoCAD. It is one of the most widely used design and engineering programs. It is used by many different professions and companies around the world because of its wide range of features and excellent functionality.And here is the answer to your How to make cursor straight in autocad? question, read on.IntroductionAlso know, how do I straighten a cursor in AutoCAD?Enter SNAPANG on the command line.Enter 90 at the prompt and press Enter.Re-enter SNAPANG on the command line.Enter 0 at the prompt and press Enter.Likewise, how do I change my cursor angle? Also the question is, how do I change my cursor to isometric in AutoCAD? the SNAP button at the staus bar and select “Settings”. Switch from “Isometric snap” to “Rectangular snap”. Or use “SNAP” command -> Style -> Standard or Isometric. Use F5 to toggle different Isomteric views.Considering this, how do I rotate my crosshairs? Enter “0” and press “Enter” to rotate the crosshairs to the normal position. You can also experiment with different crosshairs rotations by entering different values for SNAPANG.Click the UCS icon, and then click Move and Align.Drag the UCS
2025-04-10Block to make sure everything functioning properly.Save your block, and now you’re ready to rock and roll.Quick Answer, why dimensions are mirrored in AutoCAD? have you verified that the UCS is set to the same direction that the other drawing parts are? It looks like you have set the UCS to look from “behind” to the geometry, so new dimensions seems to be mirrored.The mirror command in AutoCAD is used to create a copy (mirror copy) of the selected object. We can also delete the source object after mirroring the object. The objects that represent the same as the half of their object can be mirrored across a center line to create the other half of the object.What is Mirrtext in AutoCAD?Controls the appearance of text modified by the MIRROR command. For example, the default value of 1 mirrors the text, changing the text direction.What is offset command in AutoCAD?The offset command in AutoCAD is used to create parallel lines, concentric circles, and parallel curves. We can offset any object through a point or at a specified distance. We can create as many parallel lines and curves with the help of the offset command.What is Ortho in AutoCAD?Ortho mode is used when you specify an angle or distance by means of two points using a pointing device. In Ortho mode, cursor movement is constrained to the horizontal or vertical direction relative to the UCS.How do I change mirror image in AutoCAD?Click Home tab Modify panel Mirror. Find.Select the objects to
2025-04-01