Download pico viewer
Author: l | 2025-04-25
philips pico viewer download t lecharger pico pix viewer pico プロジェクタ downroad pico galaxy pico pix fun viewer pico pix viewer; kmls pico at UpdateStar More KMSpico 11.2.1. Pico Viewer, free and safe download. Pico Viewer latest version: A full version program for Windows, by Akifuru. Pico Viewer is a full version progra

Free pico viewer Download - pico viewer for Windows - UpdateStar
EditorNanoGNU nano is designed to be a free replacement for the Pico text editor, part of the Pine email suite from The University of Washington. It aims to “emulate Pico as closely as possible and perhaps include extra functionality”.Download NanoLarge Text File Viewer (Free) It uses little memory and is able to open a gigabyte file instantly. Background file indexing makes browsing even faster. It opens files that are currently being written by other programs, and automatically checks and reads the files if new contents have been appended. It supports view split. The user may split the view either horizontally or vertically, and have each side show different portion of the same file.Download Large Text File ViewerThe V File Viewer (Commercial)V is an all-purpose File Manager for Windows with a powerful inbuilt text file viewer which excels at viewing files quickly – whether they are 100 bytes or 100 gigabytes.Download The V File ViewerMy personal favorite is PilotEdit. It shows the progress of processing, and edits huge file with in a minute.Thanks for visiting QAInsights! Check out our new portal Testifications.com to get updates on Software Testing related certifications. We’re always posting interesting articles on QAInsights. I request you to subscribe so you don’t miss out anything.Searching for QA Jobs Openings, check it at www.QAJobOpenings.comWant to start a blog like this, please visit SpidyDomain to buy cheap web hosting and register domainSubscribe to our QAInsights YouTube ChannelSubscribe our free weekly newsletter or Google feeds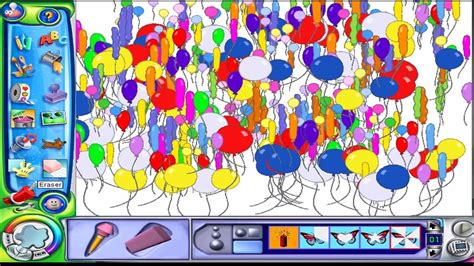
Free pico viewer 1020 Download - pico viewer 1020 for Windows
In order to view your computer screen on your Pico Projector you must install the PicoPix Viewer 2 software ( it is saved in the internal memory of your PPX2055, or you can download it from support website) Double click on PicoPix viewer 2 Setup.exe to start the installation (Administrator rights are required) Follow the on screen installation steps and reboot the computer once completed Please disconnect the Y-USB cable before rebooting After rebooting, you must reconnect the Y-USB cable Please launch the “PicoPix Viewer 2” application by double clicking on the “PicoPix Viewer 2”* icon on the desktop or you can go to Start Menu -> All the programs -> picopix viewer. Once running select the mode and brightness you want to use and click OK. To stop using the projector please exit the program from the task bar. The information on this page applies to the following models: PPX2055/F7 .Free pico viewer pdf Download - pico viewer pdf for Windows
To your Raspberry Pi or PC by USB cable, then release the button. Then copy the main.uf2 file which is saved in the build folder to the Pico (It should be recognized as a portable drive, which is named RPI-RP2).Python exampleWork with windows PC1. Press and hold the BOOTSET button of Pico, and connect the Pico to your PC by USB cable. Release the button if the Pico is recognized as a portable drive.2. Copy the rp2-pico-20210205-unstable-v1.14-8-g1f800cac3.uf2 from the Python directory to the Pico.3. Open Thonny IDE (Note: Please use the newest version).4. Click Tools -> Options -> Interpreter and choose the Port of Pico (you can check it in the Device Manager).5. Click File -> Open..., choose Raspberry-Pi-Pico-Kit-B.py, and run it.Working with Raspberry Pi1. The steps to download the firmware is the same as Windows PC. Copy the rp2-pico-20210205-unstable-v1.14-8-g1f800cac3.uf2 to Pico.2. Open the Thonny IDE in Raspberry Pi(Menu -> Programming -> Thonny Python IDE, you can check the version information in Help -> About Thonny to make sure that it is the version that supports Pico.3. Click Tools -> Options... -> Interpreter to choose the MicroPython(Raspberry Pi Pico and the ttyACM0 port.Please update the Thonny IDE if the pre-installed one doesn't support Pico.sudo apt upgrade thonny3. Click File -> Open...-> Pico-Kit-B-code/python/Raspberry-Pi-Pico-Kit-B.py and run the codes.Expected result1. The LCD keeps blank if you didn't run the demo codes;2. After running the codes, the LCD turns on and displays the data which is collected by the Pico-10DOF-IMU.ResourcesSupporting ResourcesDocumentsRP2040-Zero Schematic diagramRP2040-Zero-STEP file (3D drawing)DemoWS2812B Test CodeApplicationJustUSB Project (shared by Waveshare users)Official ResourcesRaspberry Pi Official DocumentsGet Started with MicroPython on Raspberry Pi PicoRaspberry Pi related books downloadRaspberry Pi Pico SchematicPico Pinout definitionGetting started with PicoPico C SDK User ManualPico Python SDK User ManualPico DatasheetRP2040 DatasheetRP2040 Hardware Design ManualRaspberry Pi Open Source DemosRaspberry Pi official C/C++ Demos (github)Raspberry Pi official micropython Demos (github)Other DocumentsPico WPico W DatasheetPico W step (3D file)Pico W Network ConnectionFirmwarePico W MicroPython FirmwarePicoUser ManualRaspberry-pi-pico-faqDemo CodesDemo codes for Raspberry-Pi-Pico-Kit-BPico-10DOF-IMUPico-LCD-1.14SupportTechnical SupportIf you need technical support or have any feedback/review, please click the Submit Now button to submit a ticket, Our support team will check and reply to you within 1 to 2 working days. Please be patient as we make every effort to help you to resolve the issue. Working Time: 9 AM - 6 PM GMT+8 (Monday to Friday). philips pico viewer download t lecharger pico pix viewer pico プロジェクタ downroad pico galaxy pico pix fun viewer pico pix viewer; kmls pico at UpdateStar More KMSpico 11.2.1.Free pico viewer 2 Download - pico viewer 2 for Windows
Pico Park Walkthrough: A Unique and Inventive Cooperative GamePico Park Walkthrough is a fascinating and inventive game that offers a unique cooperative experience for 2-8 players. With a total of 48 levels, each with its own set of challenges and tactics, this game guarantees hours of fun and excitement.In Pico Park Walkthrough, players must support and collaborate with each other to overcome various obstacles and find new ways to cooperate. The levels are designed to change based on the number of players, ensuring a dynamic and engaging gameplay experience.The goal of the game is simple: collect all the keys and reach the goal as quickly as possible. With each level presenting different gimmicks and challenges, players will need to strategize and move strategically to avoid obstacles and unlock doors together.Once you've completed all 48 levels, you can even challenge yourself further by playing the Infinite Mode to achieve higher scores. Playing with friends can also help you increase your score faster.Pico Park Walkthrough is available for free on Android devices, and can be played offline. Download now and enjoy this amazing cooperative game with your friends!Program available in other languagesTélécharger Pico Park Walkthrough [FR]Ladda ner Pico Park Walkthrough [SV]Download Pico Park Walkthrough [NL]Scarica Pico Park Walkthrough [IT]Unduh Pico Park Walkthrough [ID]下载Pico Park Walkthrough [ZH]Descargar Pico Park Walkthrough [ES]Pico Park Walkthrough indir [TR]ダウンロードPico Park Walkthrough [JA]Tải xuống Pico Park Walkthrough [VI]Pobierz Pico Park Walkthrough [PL]ดาวน์โหลด Pico Park Walkthrough [TH]تنزيل Pico Park Walkthrough [AR]Download do Pico Park Walkthrough [PT]Pico Park Walkthrough 다운로드Pico Manager and Pico Viewer - MediationZone Documentation
--> Test & Measurement Forum--> --> --> --> EllEff Newbie Posts: 0 Joined: Sun Jun 05, 2022 11:37 am Download Link PicoScope 6 Mac Hello,I just installed my new Mac and I did not find the download link for the PicoScope Version 6 for Mac.Sorry to say, but I never will use version 7, ever. Frank ian123123 Newbie Posts: 0 Joined: Fri Jun 24, 2022 7:48 am Re: Download Link PicoScope 6 Mac Post by ian123123 » Fri Jun 24, 2022 12:32 pm Is there a version that doesn't throw a null pointer exception when it starts on OSX 10.11 ?Unhandled Exception:System.TypeInitializationException: The type initializer for 'Pico.' threw an exception. ---> System.TypeInitializationException: The type initializer for 'Pico.' threw an exception. ---> System.ArgumentNullException: Value cannot be null. at Pico.Common.AppResources.GetResourceStream (System.String name, System.Boolean throwIfNull) [0x0000f] in :0 at Pico...ctor () [0x0001d] in :0 at Pico...cctor () [0x00000] in :0 --- End of inner exception stack trace --- at Pico..GetDisplayName () [0x00086] in :0 at Pico...cctor () [0x00062] in :0 --- End of inner exception stack trace --- at Pico..Main () [0x00040] in :0 [ERROR] FATAL UNHANDLED EXCEPTION: System.TypeInitializationException: The type initializer for 'Pico.' threw an exception. ---> System.TypeInitializationException: The type initializer for 'Pico.' threw an exception. ---> System.ArgumentNullException: Value cannot be null. at Pico.Common.AppResources.GetResourceStream (System.String name, System.Boolean throwIfNull) [0x0000f] in :0 at Pico...ctor () [0x0001d] in :0 at Pico...cctor () [0x00000] in :0 --- End of inner exception stack trace --- at Pico..GetDisplayName () [0x00086] in :0 at Pico...cctor () [0x00062] in :0 --- End of inner exception stack trace --- at Pico..Main () [0x00040] in :0Free pico viewer 無料 Download - pico viewer 無料 for Windows
ExtensionClick Extensions and select Install from VSIXSelect the package with the vsix suffix and click InstallThen vscode will automatically install raspberry-pi-pico and its dependency extensions, you can click Refresh to check the installation progressThe text in the right lower corner shows that the installation is complete. Close VSCode Configure ExtensionOpen directory C:\Users\username and copy the entire .pico-sdk to that directoryThe Copy is completedOpen vscode and configure the paths for the Raspberry Pi Pico extensionsThe configuration is as follows:Cmake Path:${HOME}/.pico-sdk/cmake/v3.28.6/bin/cmake.exeGit Path:${HOME}/.pico-sdk/git/cmd/git.exe Ninja Path:${HOME}/.pico-sdk/ninja/v1.12.1/ninja.exePython3 Path:${HOME}/.pico-sdk/python/3.12.1/python.exe New ProjectThe configuration is complete, create a new project, enter the project name, select the path, and click Create to create the projectTo test the official example, you can click on the Example next to the project name to selectThe project is created successfullySelect the SDK versionSelect Yes for advanced configurationChoose the cross-compilation chain, 13.2.Rel1 is applicable for ARM cores, RISCV.13.3 is applicable for RISCV cores. You can select either based on your requirementsSelect default for CMake version (the path configured earlier)Select default for Ninjaversion Select the development boardClick Complie to compileThe uf2 format file is successfully compiledImport ProjectThe Cmake file of the imported project cannot have Chinese (including comments), otherwise the import may failTo import your own project, you need to add a line of code to the Cmake file to switch between pico and pico2 normally, otherwise even if pico2 is selected, the compiled firmware will still be suitable for picoset(PICO_BOARD pico CACHE STRING "Board type")Update ExtensionThe extension version in the offline package is 0.15.2, and you can also choose to update to the latest version after the installation is completeArduino IDE SeriesInstall Arduino IDEFirst, go to Arduino official website to download the installation package of the Arduino IDE. Here, you can select Just Download. Once the download is complete, click Install. Notice: During the installation process, it will prompt you to install the driver, just click InstallArduino IDE InterfaceAfter the first installation, when you open the Arduino IDE, it will be in English. You can switch to other languages in File --> Preferences, or continue using the English interface. In the Language field, selectDownload gr tis pico viewer philips win8 - pico viewer philips win8
Luke Wren (see description above). It is a DVI output with an HDMI connector. As HDMI is downward-compatible to DVI, you can use an HDMI cable to connect your Pico to HDMI displays:Programming the Pico DVI SockTL;DRYou can download our picodvi-test.zip and get started playing around with the .UF2 example compiles in it. It also includes a PDF which gives you a step-by-step guide.Code examplesLuke Wren provides code examples in his repository. However, to use them with the Pico DVI Sock, you’ll need to set the correct config to use. We’ll show you how in this mini-tutorial.Install Prerequisitessudo apt install cmake gcc-arm-none-eabi libnewlib-arm-none-eabi build-essentialClone PicoDVI repo from Luke Wren:cd ~mkdir picocd pico git clone pico-sdkgit submodule update --initcd ~/picogit clone use the code examples with the Pico DVI Sock, you’ll need to set the correct pin config to use. Add the following line to common_dvi_pin_configs.h just before the first #ifndef#define DEFAULT_DVI_SERIAL_CONFIG pico_sock_cfgBuilding the examplescd PicoDVI/software/mkdir buildcd buildexport PICO_SDK_PATH=~/pico/pico-sdkmake -j$(nproc)Install the examples on the PicoThe built examples will be in the software/build/apps folder. Press and hold the BOOTSEL key on the Pico, then connect the board to your PC using the microUSB connector. Copy and paste the appropriate .uf2 file you want to try – e.g. sprite_bounce.uf2 – to the Pico. The Pico will automatically restart, and you should be able to see output on the HDMI connector (remember it’s DVI really :-)). DownloadYou can download our picodvi-test.zip and get started playing around with the .UF2 example compiles in it. It also includes a PDF which gives you a step-by-step guide. If the sprite_bounce.uf2 example doesn’t work for you, try another monitor – possibly not all monitors are compatible with this video output.If you’ve come so far, let us know in the comments how it worked for you & what project. philips pico viewer download t lecharger pico pix viewer pico プロジェクタ downroad pico galaxy pico pix fun viewer pico pix viewer; kmls pico at UpdateStar More KMSpico 11.2.1.
Free pico viewer 汉化 Download - pico viewer 汉化 for Windows
First, and in the lower right corner of Thonny left-click on the configuration environment option --> select Configture interpreterIn the pop-up window, select MicroPython (Raspberry Pi Pico), and choose the corresponding portFlash FirmwareClick OK to return to the Thonny main interface, download the corresponding firmware library and burn it to the device, and then click the Stop button to display the current environment in the Shell windowNote: Flashing the Pico2 firmware provided by Micropython may cause the device to be unrecognized, please use the firmware below or in the packagePico firmware libraryPico2 firmware libraryHow to download the firmware library for Pico/Pico2 in windows: After holding down the BOOT button and connecting to the computer, release the BOOT button, a removable disk will appear on the computer, copy the firmware library into itHow to download the firmware library for RP2040/RP2350 in windows: After connecting to the computer, press the BOOT key and the RESET key at the same time, release the RESET key first and then release the BOOT key, a removable disk will appear on the computer, copy the firmware library into it (you can also use the Pico/Pico2 method)MicroPython Series【MicroPython】 machine.Pin class function details【MicroPython】machine.PWM class function details【MicroPython】machine.ADC class function details【MicroPython】machine.UART class function details【MicroPython】machine.I2C class function details【MicroPython】machine.SPI class function details【MicroPython】rp2.StateMachine class function detailsC/C++ SeriesFor C/C++, it is recommended to use Pico VS Code for development. This is a Microsoft Visual Studio Code extension designed to make it easier for you to create, develop, and debug projects for the Raspberry Pi Pico series development boards. No matter if you are a beginner or an experienced professional, this tool can assist you in developing Pico with confidence and ease. Here's how to install and use the extension.Official website tutorial: tutorial is suitable for Raspberry Pi Pico, Pico2 and the RP2040 and RP2350 series development boards developed by WaveshareThe development environment defaults to Windows11. For other environments, please refer to the official tutorial for installationInstall VSCodeFirst, click to download pico-vscode package, unzip and open the package, double-click to install VSCode Note: If vscode is installed, check if the version is v1.87.0 or laterInstallFree pico viewer下载 Download - pico viewer下载 for Windows
Raspberry Pi, please refer to this configuration step.Current Raspberry Pi systems come with Thonny IDE.But if Thonny is not updated to the latest version, there is no Pico support package, and you need to update Thonny to the latest v3.3.3 version.Enable a terminal and enter the following command to update thonny.sudo apt upgrade thonnyOpen Thonny IDE (click Raspberry logo -> Programming -> Thonny Python IDE).Select Tools -> Options... -> Interpreter.Select MicroPython (Raspberry Pi Pico and ttyACM0 port.LED Control DemoConnect the Pico to the computer (without pressing any keys), if you have not flashed MicroPython before, please follow the #Flash Firmware operation.Select Tools -> Options... -> Interpreter.Select Raspberry Pi Pico in the interpreter options (be careful to download the latest version of Thonny, otherwise there is no option).port selection.On the computer, the port is selected as, after connecting to Pico, the COM port recognized by the computer.On the Raspberry Pi, the port is identified as /dev/ttyACM0.Then confirm.After confirmation, you can see that there will be multiple Pico information in the command line interface, and now you can enter the MicroPython program here to control the Pico.Looking at the pin diagram of Pico, we know that the control pin of Pico's on-board LED is GPIO25, here we try to control the on-board LED.Run the following code in sequence in Thonny:>>> from machine import Pin>>> led = Pin(25, Pin.OUT)>>> led.value(1)>>> led.value(0)After running the code in sequence, you can see that the Pico onboard LED lights are turned on and then off.【Note】If you want to know more about the functions of Pico Micropython, you can refer to Pico Python SDK Manual.Hardware ConnectionPlease take care of the direction when you connect Pico, an USB port is printed to indicate. You can also check the pin of Pico and the LCD board when connecting.You can connect the display according to the table.LCDPicoDescriptionVCCVSYSPower InputGNDGNDGNDMPU.INTGP2INT pin of ICM20948LPS.INTGP3INT pin of LPS22HBSDAGP6SDA pin of I2CSCLGP7SCL pin of I2CFSYNCGP22FSYNC pin of ICM20948Connect the expansion boardEnvironment BuildingPlease refer to Here.Download the examplesOpen a Raspberry Pi terminal and run the following commands:sudo apt-get install p7zip-fullcd ~sudo wget x Pico-Kit-B-code.7z -o./Pico-Kit-B-codecd ~/Pico-Kit-B-codecd c/build/How to useC ExampleGo to the directory of the C example and build it.cd ~/Pico-Kit-B-code/c/Create the build folder and enter it. add the SDK:../../pico-sdk #should be the path of the SDK according to the actual situation.We have created the build folder in the example, you can just enter it.cd buildexport PICO_SDK_PATH=../../pico-sdk(Note: Please check if you set the correct path of SDK, it may be different for different users)Run cmake to generate the Makefilecmake ..Run make to build the example, it will take minutes.make -j9uf2 is generated after building.Press and hold the button of the Pico board, and then connect the Pico. philips pico viewer download t lecharger pico pix viewer pico プロジェクタ downroad pico galaxy pico pix fun viewer pico pix viewer; kmls pico at UpdateStar More KMSpico 11.2.1.Pico Viewer - Download and install on Windows
Raspberry PicoRaspberry Pi Pico is a low-cost, high-performance microcontroller board with flexible digital interfaces. It incorporates Raspberry Pi's own RP2040 microcontroller chip, with a dual-core Arm Cortex M0+ processor running up to 133 MHz, embedded 264KB of SRAM, and 2MB of onboard Flash memory, as well as 26x multi-function GPIO pins.For software development, either Raspberry Pi's C/C++ SDK or the MicroPython is available. There are also complete development resources and tutorials to help you get started easily, and integrate it into end products quickly.Details of the Start KitRaspberry Pi Pico with pre-soldered header x1Pico-LCD-1.14 x 1Pico-10DOF-IMU x 1Breadboard x11*3PIN yellow pin header x 1Pico-Dual-Expander x 1USB-A to micro-B cable x 1Jumper wires x 1FeaturesRP2040 microcontroller chip designed by Raspberry Pi in the United Kingdom.Dual-core Arm Cortex M0+ processor, a flexible clock running up to 133 MHz.264KB of SRAM, and 2MB of onboard Flash memory.Castellated module allows soldering direct to carrier boards.USB 1.1 with device and host support.Low-power sleep and dormant modes.Drag-and-drop programming using mass storage over USB.26 × multi-function GPIO pins.2 × SPI, 2 × I2C, 2 × UART, 3 × 12-bit ADC, 16 × controllable PWM channels.Accurate clock and timer on-chip.Temperature sensor.Accelerated floating-point libraries on-chip.8 × Programmable I/O (PIO) state machines for custom peripheral support.PinoutDimensionsUser Guides for MicroPythonFlash FirmwareDownload Testing Firmware to your computer and extract it.There are two uf2 files, the pico_micropython_20210121.uf2 file is MicroPython firmware.Press the button on the Pico board, connect the Pico to the USB port of the computer via the Micro USB cable, and then release the button.After connecting, the computer will automatically recognize a removable disk (RPI-RP2).Copy and drag the firmware file downloaded earlier to the RPi-RP2 mobile disk.After the copy is completed, Pico will automatically restart, and after the automatic restart, pico will be recognized as a virtual serial port.【Note】 1. Is the mobile disk not automatically recognized after connecting to Pico?▶ Check that the BOOTSEL button is not pressed or released in the middle.▶ The Micro USB cable used must be a data cable, and the USB cable that can only be used for power supply cannot be used.2. You can also operate on the Raspberry Pi, the operation steps are the same, also connect the pico to the Raspberry Pi, and then drag the firmware to the mobile disk.Software Environment DebuggingWindowsTo facilitate the development of Pico boards using MicroPython on the computer, it is recommended to download Thonny IDE.Download Thonny IDE and follow the steps to installThonny IDE download link (Windows version)Thonny official websiteAfter the installation is completed, the first time you need to configure the language and motherboard environment because we are using Pico, so pay attention to selecting the Raspberry Pi option.RaspberryIf you want to control Pico onComments
EditorNanoGNU nano is designed to be a free replacement for the Pico text editor, part of the Pine email suite from The University of Washington. It aims to “emulate Pico as closely as possible and perhaps include extra functionality”.Download NanoLarge Text File Viewer (Free) It uses little memory and is able to open a gigabyte file instantly. Background file indexing makes browsing even faster. It opens files that are currently being written by other programs, and automatically checks and reads the files if new contents have been appended. It supports view split. The user may split the view either horizontally or vertically, and have each side show different portion of the same file.Download Large Text File ViewerThe V File Viewer (Commercial)V is an all-purpose File Manager for Windows with a powerful inbuilt text file viewer which excels at viewing files quickly – whether they are 100 bytes or 100 gigabytes.Download The V File ViewerMy personal favorite is PilotEdit. It shows the progress of processing, and edits huge file with in a minute.Thanks for visiting QAInsights! Check out our new portal Testifications.com to get updates on Software Testing related certifications. We’re always posting interesting articles on QAInsights. I request you to subscribe so you don’t miss out anything.Searching for QA Jobs Openings, check it at www.QAJobOpenings.comWant to start a blog like this, please visit SpidyDomain to buy cheap web hosting and register domainSubscribe to our QAInsights YouTube ChannelSubscribe our free weekly newsletter or Google feeds
2025-04-12In order to view your computer screen on your Pico Projector you must install the PicoPix Viewer 2 software ( it is saved in the internal memory of your PPX2055, or you can download it from support website) Double click on PicoPix viewer 2 Setup.exe to start the installation (Administrator rights are required) Follow the on screen installation steps and reboot the computer once completed Please disconnect the Y-USB cable before rebooting After rebooting, you must reconnect the Y-USB cable Please launch the “PicoPix Viewer 2” application by double clicking on the “PicoPix Viewer 2”* icon on the desktop or you can go to Start Menu -> All the programs -> picopix viewer. Once running select the mode and brightness you want to use and click OK. To stop using the projector please exit the program from the task bar. The information on this page applies to the following models: PPX2055/F7 .
2025-04-09Pico Park Walkthrough: A Unique and Inventive Cooperative GamePico Park Walkthrough is a fascinating and inventive game that offers a unique cooperative experience for 2-8 players. With a total of 48 levels, each with its own set of challenges and tactics, this game guarantees hours of fun and excitement.In Pico Park Walkthrough, players must support and collaborate with each other to overcome various obstacles and find new ways to cooperate. The levels are designed to change based on the number of players, ensuring a dynamic and engaging gameplay experience.The goal of the game is simple: collect all the keys and reach the goal as quickly as possible. With each level presenting different gimmicks and challenges, players will need to strategize and move strategically to avoid obstacles and unlock doors together.Once you've completed all 48 levels, you can even challenge yourself further by playing the Infinite Mode to achieve higher scores. Playing with friends can also help you increase your score faster.Pico Park Walkthrough is available for free on Android devices, and can be played offline. Download now and enjoy this amazing cooperative game with your friends!Program available in other languagesTélécharger Pico Park Walkthrough [FR]Ladda ner Pico Park Walkthrough [SV]Download Pico Park Walkthrough [NL]Scarica Pico Park Walkthrough [IT]Unduh Pico Park Walkthrough [ID]下载Pico Park Walkthrough [ZH]Descargar Pico Park Walkthrough [ES]Pico Park Walkthrough indir [TR]ダウンロードPico Park Walkthrough [JA]Tải xuống Pico Park Walkthrough [VI]Pobierz Pico Park Walkthrough [PL]ดาวน์โหลด Pico Park Walkthrough [TH]تنزيل Pico Park Walkthrough [AR]Download do Pico Park Walkthrough [PT]Pico Park Walkthrough 다운로드
2025-04-15--> Test & Measurement Forum--> --> --> --> EllEff Newbie Posts: 0 Joined: Sun Jun 05, 2022 11:37 am Download Link PicoScope 6 Mac Hello,I just installed my new Mac and I did not find the download link for the PicoScope Version 6 for Mac.Sorry to say, but I never will use version 7, ever. Frank ian123123 Newbie Posts: 0 Joined: Fri Jun 24, 2022 7:48 am Re: Download Link PicoScope 6 Mac Post by ian123123 » Fri Jun 24, 2022 12:32 pm Is there a version that doesn't throw a null pointer exception when it starts on OSX 10.11 ?Unhandled Exception:System.TypeInitializationException: The type initializer for 'Pico.' threw an exception. ---> System.TypeInitializationException: The type initializer for 'Pico.' threw an exception. ---> System.ArgumentNullException: Value cannot be null. at Pico.Common.AppResources.GetResourceStream (System.String name, System.Boolean throwIfNull) [0x0000f] in :0 at Pico...ctor () [0x0001d] in :0 at Pico...cctor () [0x00000] in :0 --- End of inner exception stack trace --- at Pico..GetDisplayName () [0x00086] in :0 at Pico...cctor () [0x00062] in :0 --- End of inner exception stack trace --- at Pico..Main () [0x00040] in :0 [ERROR] FATAL UNHANDLED EXCEPTION: System.TypeInitializationException: The type initializer for 'Pico.' threw an exception. ---> System.TypeInitializationException: The type initializer for 'Pico.' threw an exception. ---> System.ArgumentNullException: Value cannot be null. at Pico.Common.AppResources.GetResourceStream (System.String name, System.Boolean throwIfNull) [0x0000f] in :0 at Pico...ctor () [0x0001d] in :0 at Pico...cctor () [0x00000] in :0 --- End of inner exception stack trace --- at Pico..GetDisplayName () [0x00086] in :0 at Pico...cctor () [0x00062] in :0 --- End of inner exception stack trace --- at Pico..Main () [0x00040] in :0
2025-04-22